
ICON (ICX) was listed on Binance, a world-class cryptocurrency trading platform, on December 18, 2017. Within hours of listing on Binance, ICX became one of the most traded currencies. Now that ICX is listed on Binance, our contributors and community members can trade the tokens more easily.
Binance is a global blockchain company that offers cryptocurrency trading through a variety of services in multiple languages. Its 24-hour trading volume of over $2 billion has successfully positioned Binance Exchange among the top-five exchanges.
According to the ICON website, this South Korean blockchain startup aims to “hyper connect the world.” The ICX token, their native token, has received a lot of hype because it aims to connect all the world’s blockchain networks and traditional infrastructures. As of today, ICX has a market capitalization of more than US$260 million, making it the 34th largest in the market.
With ICON (ICX) being a relatively new cryptocurrency, there is still some uncertainty, but it also presents significant potential.
In this guide, we will tell you how to buy ICON (icx) coins on Binance.
What is ICON Cryptocurrency?
There have been many different smart contract platforms emerging in the last few years, posing a question of interoperability. Do NEO apps have the ability to communicate with Ethereum or Cardano apps? The goal of ICON blockchain is to solve this problem. Through their platform, different blockchain networks will be able to work together, as well as different cryptocurrencies can be exchanged seamlessly.
In spite of the fact that it’s still at an early stage of development, it’s an ambitious project with a lot of potential. In October 2018, ICON’s mainnet was launched, and as of now, it serves around 1000 transactions per day. With the launch of the mainnet, ICON is poised to see significant growth. Additionally, the company has a partnership with SK, South Korea’s largest telecom company.
How To Buy ICON (ICX) on Binance
The availability of Fiat currencies for purchasing ICX is very limited at this point. Using Binance, we will teach you how to trade Bitcoin, Ethereum, Binance Coin, or Tether for ICX. In addition to Cardano (ADA), Cosmos (ATOM) is a competitor to digital currency at present. There are in-depth guides for both of these projects if you want to learn more.
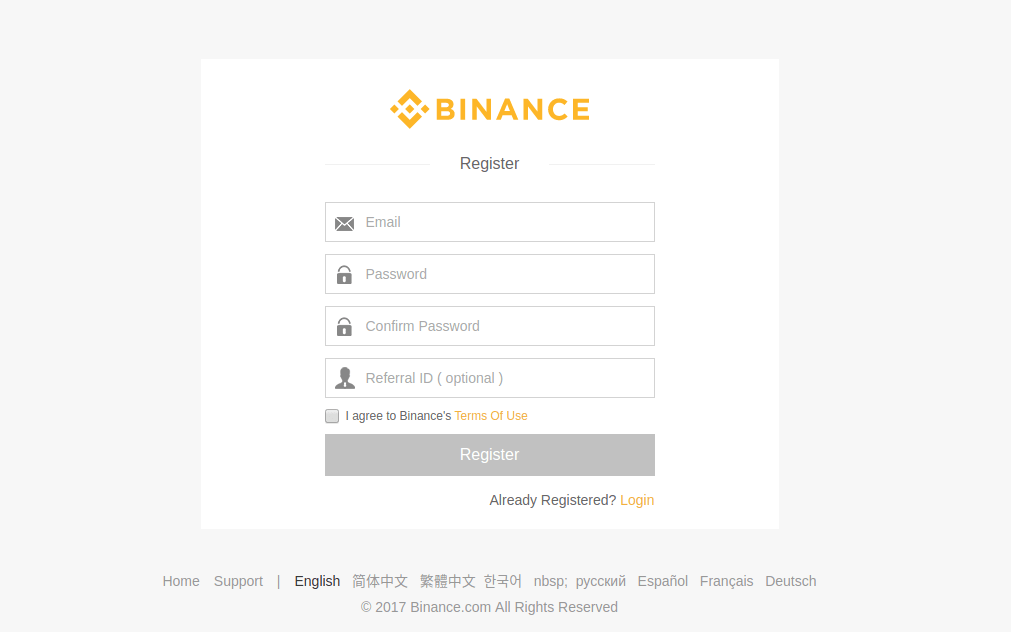
Step 1: First create an account on Binance
There are a number of crypto exchanges around the world, but Binance is one of the most popular and recognized. With a market capitalization of $685 million in the last 24 hours, Binance is the 10th largest cryptocurrency exchange by CoinMarketCap.
As a leader in the crypto trading market for over two years, users tend to choose this crypto trading platform for its large liquidity for altcoins. In order to buy an ICON coin, investors can choose from four different trading pairs, including ICX/BNB, ICX/BTC, ICX/ETH, and ICX/USDT. The trading volume on this platform is currently dominated by ICON, which represents 0.22% of all trading volume.
Despite its competitiveness, this crypto exchange offers the best services in the industry.
A Binance account must be created if you haven’t already. Binance’s user-friendly interface should make the registration process quick.
Step 2: Verify your Binance account
Several verification documents need to be submitted before trading with Binance can begin. For security reasons, you should also set up 2-Factor Authentication too.
After successful verification of your email or phone number, it will ask you to Verify your Identity.
The customer must upload a picture of a government identification card or other document confirming his or her name, date of birth, and location. You can choose the type of ID and the country from which your documents were issued. The following documents are accepted: a passport, a driver’s license, and an ID card. A photograph or scan of a document must clearly show both sides of the document, such as the front and back of an ID card.
The “Upload File” button allows users to upload an existing photo from their device.
It is important for users to make sure that all details are clearly visible in order to prevent delays in the verification process.
Users will be prompted to upload a selfie after uploading document photos.
Binance will verify the user’s identity once the selfie has been submitted by performing a facial recognition scan. Based on the uploaded selfie and valid ID documentation, Binance will verify facial verification through the device’s camera.
Following the facial recognition step, Binance will review the submitted data and will send an email to the user informing them of the verification. The process is usually quick but can take longer if the facial recognition and documents need to be verified separately. Users may attempt the process again up to ten times within 24 hours if facial recognition or other documents fail to provide proper verification.
Step 3: Send BTC, ETH, BNB, or USDT to Your Binance Account
Your Binance account will be activated once your Bitcoin, Ethereum, Binance Coin, or Tether have been approved. From sites like Coinmama, Changelly, or Coinbase, people from most countries can purchase these coins with a credit or debit card if they don’t already have one.
Select “Funds” and then “Deposits” on the top bar. Please select your desired coin from the dropdown menu.
A wallet address will be provided to you on the next screen. Don’t send anything else to this address – only the selected type of coin, for example. Bitcoin is the only currency that should be sent to the Bitcoin address.

Step 4: Wait for confirmation
If there is a lot of activity on the network, it may take some time for the transaction to complete. Be patient and wait until your deposit is processed before moving forward.
Step 5: Find and select the BTC, ETH, BNB, or USDT Pair
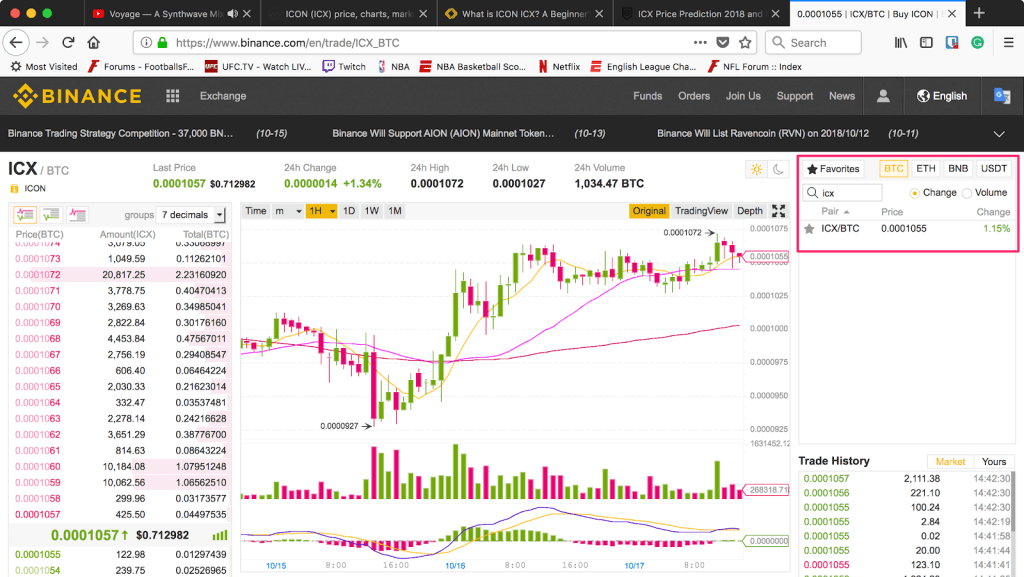
It’s now time to take a look at Binance’s exchange section after making a deposit.
Select “Exchange” in the top menu, then “Basic”. You’ll be taken to the trading screen after clicking this.
A box will appear on the right showing BTC, ETH, BNB, and USDT pairs. You can search for ICX by choosing the coin you deposited earlier. To select a pair (ICX/BTC, ICX/ETH, ICX/BNB, or ICX/USDT), click on it.
Optional: Use Binance’s advanced tools to buy at the right time
Users of Binance’s Basic exchange can buy low and sell high using multiple methods. Your selected pair will be displayed in detailed order history, along with limit orders. You may use limit orders to buy or sell at a specific price. Binance will automatically execute your trade when ICON coin reaches the price you entered. If you are a novice trader, you may opt to buy at the current market price.
In addition to being able to improve their trading activities with the advanced tools provided by Binance, users can also find better prices for the digital currencies they want to buy or sell. Limit orders can reduce trading fees and increase price selection when used in this case.
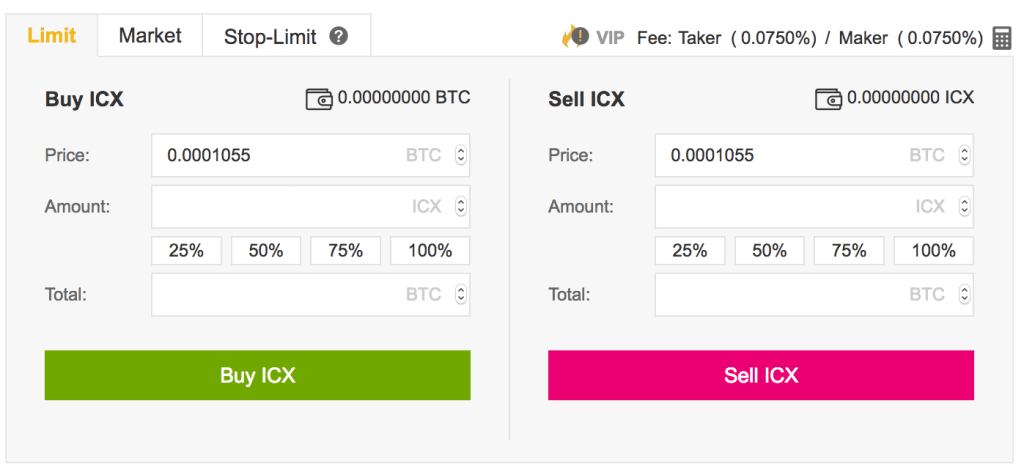
Step 6: Choose the amount of ICON (ICX) you want to buy
Choose how much you would like to purchase. In your BTC/ETH/BNB or USDT wallet, you can choose to spend a certain amount of ICX or 25%, 50%, 75%, or 100% of your coins.
Step 7: Buy ICON!
If you would like to purchase ICX, click “Buy ICX.” Upon completing the network confirmation, you are done!
Step 8: Move your coins to a secure ICON Blockchain wallet
It is always a good idea to keep your cryptocurrency in a secure wallet that you control. Once you’ve finished trading, you’ll need to move your coins off the exchange.
Cryptocurrencies should typically be stored in hardware wallets. In addition to being safe from attacks or hacks, you would have your funds always protected. A wallet like this does not come free, however.
Since ICX is a relatively new token, there are not a wide array of wallets supporting it because it has just recently transitioned from an ERC-20 placeholder. It is recommended that you use a hardware wallet, such as the Ledger Nano S or the Trezor. In addition, the ICON team itself developed the free multi-platform wallet ICONex.
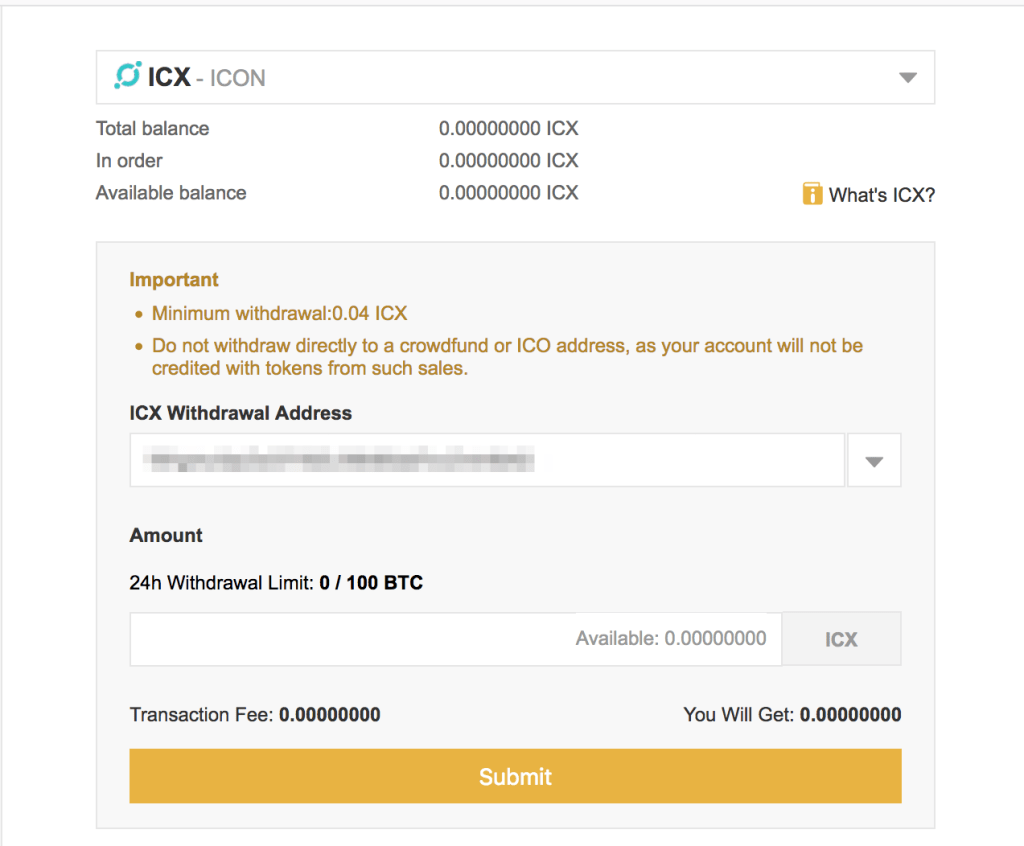
Choose “Funds” then “Withdrawals” from Binance to withdraw your coins.
The dropdown menu will show “ICX ICON”.
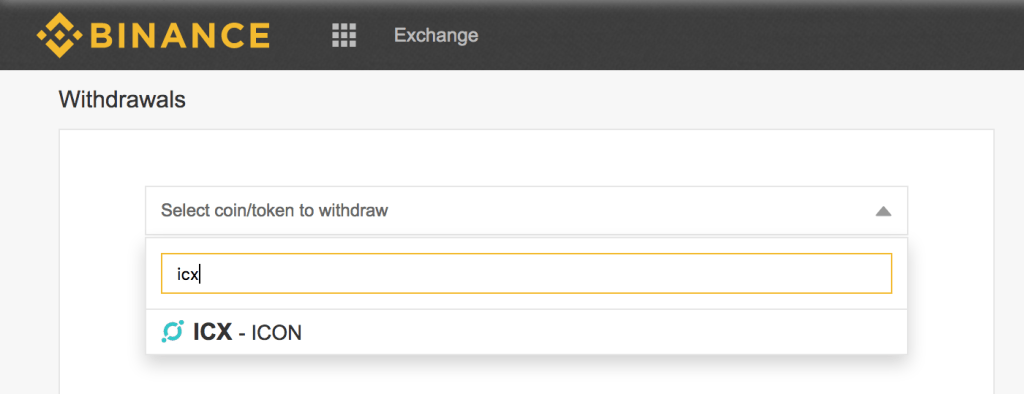
When you click this, you will be prompted to enter your wallet address. Click on “Submit” once you’ve added your ICON (ICX) wallet address. After the withdrawal is completed, you will receive a confirmation from Binance.
It is good for prive discovery and trading activities that Binance has large liquidity for altcoins. Credit cards are also accepted on this platform for the purchase of digital assets. Credit card purchases are not available for all trading pairs, however. There may be a future option to add ICON.
So there you have it! Now you know how to invest in ICON (ICX) coin on Binance, token for the future of hyperconnected decentralized networks.
Via this site